Showing posts with label Bread. Show all posts

Wednesday, June 15, 2011

Healthy bread in 5 mins a day Master Recipe

I LOVE my new bread cookbook and I love how quick and easy it is to have fresh homemade bread daily! Check out the website for the cookbook.  http://www.artisanbreadinfive.com/ The book that I own is the Healthy Bread in 5 minutes a day, they also have one called  Artisan bread in 5 minutes a day cookbook.


4 cups lukewarm water (you can use cold water, but it will take the dough longer to rise. Just don’t use hot water or you may kill the yeast)

1 1/2 tablespoons granulated yeast or 2 packets

1  tablespoons Kosher Salt

2 cups (2-pounds) unbleached all-purpose flour


5 1/2 cups whole wheat flour

1/4 cup vital wheat gluten

cornmeal or parchment paper for the pizza peel

Mixing the dough: n a 5 or 6 quart bowl or lidded Food Storage Container, dump in the water and add the yeast and salt.

Dump in the flour all at once and stir with a long handled wooden spoon or a Danish Dough Whisk, which is one of the tools that makes the job so much easier!

Stir it until all of the flour is incorporated into the dough, as you can see it will be a wet rough dough.

Put the lid on the container, but do not snap it shut. You want the gases from the yeast to escape. (I had my husband put a little hole in the top of the lids so that I could close the lids and still allow the gases to get out.)

Allow the dough to sit at room temperature for about 2 hours to rise. When you first mix the dough it will not occupy much of the container.

But, after the initial 2 hour rise it will pretty much fill it. (If you have decreased the yeast you will have to let it go longer than 2 hours.) DO NOT PUNCH DOWN THE DOUGH! Just let it settle by itself.

The dough will be flat on the top and some of the bubbles may even appear to be popping. (If you intend to refrigerate the dough after this stage it can be placed in the refrigerator even if the dough is not perfectly flat. The yeast will continue to work even in the refrigerator.) The dough can be used right after the initial 2 hour rise, but it is much easier to handle when it is chilled. It is intended for refrigeration and use over the next two weeks, ready for you anytime. The flavor will deepen over that time, developing sourdough characteristics.

The next day when you pull the dough out of the refrigerator you will notice that it has collapsed and this is totally normal for our dough. It will never rise up again in the container.

Dust the surface of the dough with a little flour, just enough to prevent it from sticking to your hands when you reach in to pull a piece out.

You should notice that the dough has a lot of stretch once it has rested. (If your dough breaks off instead of stretching like this your dough is probably too dry and you can just add a few tablespoons of water and let it sit again until the dough absorbs the additional water.)

Cut off a 1-pound piece of dough using kitchen shears* and form it into a ball. Place the ball on a sheet of parchment paper… (or rest it on a generous layer of corn meal on top of a pizza peel.)

Let the dough rest for at least 40 minutes, (although letting it go 60 or even 90 minutes will give you a more open hole structure in the interior of the loaf. This may also improve the look of your loaf and prevent it from splitting on the bottom. ) You will notice that the loaf does not rise much during this rest, in fact it may just spread sideways, this is normal for our dough.
preheat the oven to 450 degrees with a Baking Stone* on the center rack, with a metal broiler tray on the bottom (never use a glass vessel for this or it will shatter), which will be used to produce steam. (The tray needs to be at least 4 or 5 inches away from your stone to prevent it from cracking.)
*(or Cast Iron Pizza Pan- which will never crack and conducts heat really well. Be careful to dry it after washing rinsing with water or it will rust)

Cut the loaf with 1/4-inch slashes using a serrated knife. (If your slashes are too shallow you will end up with an oddly shaped loaf and also prevent it from splitting on the bottom.)

Put the loaf into the oven onto the stone or cast iron and add a cup of hot water to the broiler tray. I put a cookie sheet in the oven on the bottom rack with water because I don't have a broiler tray. Bake the bread for 30-35 minutes or until a deep brown color. As the bread bakes you should notice a nice oven spring in the dough. This is where the dough rises. To insure that you get the best results it is crucial to have an Oven Thermometer to make sure your oven is accurate.

If you used parchment paper you will want to remove it after about 20-25 minutes to crisp up the bottom crust. Continue baking the loaf directly on the stone for the last 5-10 minutes.

Allow the loaf to cool on a rack until it is room temperature. If you cut into a loaf before it is cooled you will have a tough crust and a gummy interior.
Bon Appétit,


Recipe from the cookbook "Healthy Bread in Five Minutes a Day" Photo by Laura Spear

Sunday, September 26, 2010

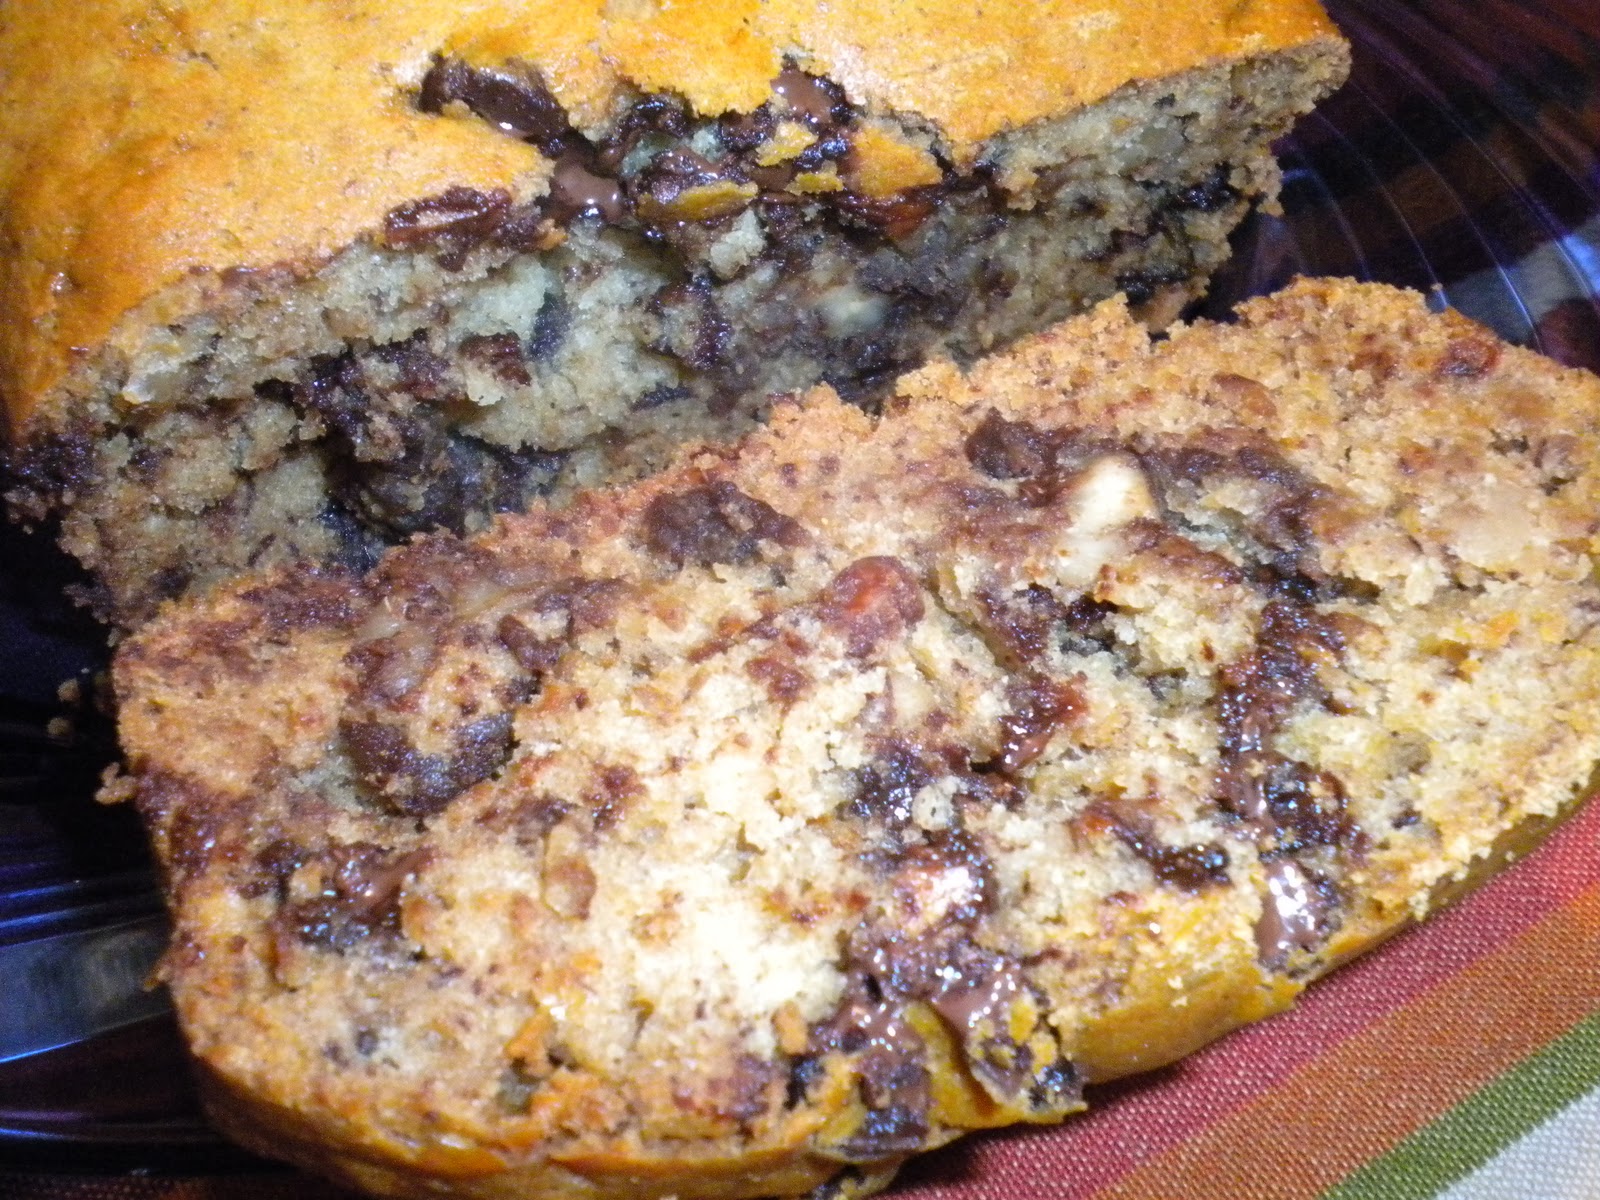
Chocolate Chip Banana Walnut Cake (Veg and Vegan)


Ingredients:


Dry

2 cups flour
1 cup sugar
1 teaspoon baking powder
1 teaspoon egg replacer
½ teaspoon baking soda
1 teaspoon salt
½ teaspoon ground ginger
½ teaspoon ground cinnamon
¼ teaspoon freshly ground nutmeg


Wet

1 cup mashed bananas (apprx. 2 large very ripe bananas with some brown spots, mashed on a plate using the back of a fork)
1 cup coconut milk
¾ cup canola oil
1 ½ teaspoons vinegar

1 tablespoon pure vanilla extract

Mix In's

1 cup chocolate chips (vegan)
1/2 cup chopped walnuts
sifted powdered sugar for garnish (optional)


Procedure:

1. Preheat oven to 350 and oil a loaf pan.

2. Whisk together dry ingredients in a large bowl.

3. In a separate medium bowl, puree wet ingredients with a whisk until thoroughly combined.

4. Pour wet mixture into dry and whisk quickly to combine. Fold in chocolate chips and walnuts with a spoon or spatula. Spread batter evenly into prepared loaf pan and bake for 20 minutes. Rotate, and bake for another 20-35 minutes, or until skewer comes out slightly crummy/clean.

5. Let cool then sift with powdered sugar (if using)
 
Recipe by Chef Chloe, Photos by Laura Spear

100% Whole Grain Wheat Bread (Veg and Vegan)

Easy Fresh Whole Grain Bread is just a few steps away! I'm making this bread to use for my kids lunches this week. If you have a kitchenaid mixer then you can save yourself a lot of time on this recipe, please see my note at the bottom.


2 3/4 cups of hot water

1/3 cup of oil, olive is fine

1/4 cup of raw sugar

2 tablespoons molasses

1 tablespoon salt, sea salt is good

7 1/2 cups (max) of 100% whole grain wheat flour

2 tablespoons of dry active yeast


Directions:

Place the first five ingredients in the bowl and mix.

 Add: 2 Cups 100% whole grain wheat flour. Mix, then add 2 tablespoons of dry active yeast. If your not sure about your yeast proof it in a little warm water first.

 Add: 4 cups of 100% whole grain wheat flour.

Mix until the consistency is some what even. Then continue to slowly add flour 1/2 cup at a time until the dough quits sticking to the sides of the bowl. It should be tacky to the touch. The trick is to have enough consistency to stand up with the least amount of flour so the bread will be fluffy. In any case do not exceed 7 1/2 cups of wheat flour. You can trade one cup of wheat flour for one cup of all purpose white if you wish. Don't over mix or the bread will be tough.

When your dough is finished, Cover the bowl and let it rise for about 30-45 minutes. The dough will be larger but it doesn't need to double when using a heavy mixer.

Grease two bread pans with Crisco. You can also flour the pans to reduce sticking.

Mix again just enough to knock it down at least close to the original size.

Drop the dough on a floured surface so you can work the dough and shape it. Roll it in the flour and shape it in your hands to make a nice ball getting enough flour on it so it isn't sticky.

Divide the ball in half and do it again.

Shape the loaves by turning the dough under it's self over and over. When the dough is shaped right the sides and ends will be sealed and all you will see is a nice oblong shaped loaf with smooth sides and top.

Drop the loaves in your bread pans and let them rise until almost doubled. Bake in a preheated oven at 350 for 36 minutes. If you forgot to preheat 41 minutes. (gas oven)

When done turn the bread out of the pan to a rack to cool. You can eat it right away. Don't wrap it until completely cooled. (Condensation will make it soggy) Put in tinfoil to store on the counter. If you put it in the refrigerator it will turn into a brick. Enjoy.


Note: I used my kitchenaid electric mixer with the bread hook to do all my kneading.  After it was well mixed i let the bowl sit until the dough had doubled.  Then I used the hook again.  Cut it to fit my two loaf pans, shaped it and then let it rise in the pan until doubled.  Then I baked it.  Easy.

Recipe from Vegweb.com Photos by Laura Spear

Monday, September 20, 2010

Whole Wheat Banana Nut Bread (Veg and Vegan)


•2 Large Ripe Bananas

•1/4 Cup Canola Oil
•1 Teaspoon Banana Flavoring
•1 Teaspoon Vanilla
•1 Cup Whole Wheat Flour
•1/2 Cup All Purpose Flour
•1/2 Cup Finely Chopped Pecans
•3 Teaspoons Baking Powder
•1/4 Teaspoon Baking Soda
•1/4 Teaspoon Salt
•1/4 Teaspoon Nutmeg
•1/4 Teaspoon Cinnamon
•1/2 Cup Sugar
•1 Teaspoon Vinegar
•1/2 Cup Rice Milk


Preheat oven to 350 degrees. In a mixing bowl mash the 2 ripe bananas with a fork until smooth. Into mixing bowl add oil, banana flavoring, vanilla, whole wheat and all purpose flour, baking powder, baking soda, salt, nutmeg, cinnamon, pecans and sugar. In a cup pour rice milk and vinegar together and then pour into mixing bowl with rest of ingredients. Mix all ingredients with spoon until well blended together. Grease and coat an 8.50 X 4.50 loaf pan with flour. Pour bread dough mixture into loaf pan and place into oven. Bake, without opening oven, for 40 to 45 minutes. Let cool for 10 minutes, then carefully dump out of pan.


Recipe from my vegan cookbook Photos by Laura Spear

Monday, July 12, 2010

Red Lobster's Cheddar Biscuits


If you don't own a Todd Wilbur cookbook then you should pick one up we own 3 of them, his secret recipes are amazing and he has tons to choose from which cover most of our favorite restaurants.


Ingredients:

2 ½ cups Bisquick baking mix

¾ cup cold whole milk

4 tablespoons cold butter (1/2 stick)

¼ teaspoon garlic powder

1 heaping cup grated cheddar cheese

Bush on Top:

2 tablespoons butter, melted

¼ teaspoon dried parsley flakes

½ teaspoon garlic powder

pinch salt

Directions:

1. Preheat your oven to 400 degrees.

2. Combine Bisquick with cold butter in a medium bowl using a pastry cutter or a large fork. You don't want to mix too thoroughly. There should be small chunks of butter in there that are about the size of peas. Add cheddar cheese, milk, and ¼ teaspoon garlic. Mix by hand until combined, but don't over mix.

3. Drop approximately ¼-cup portions of the dough onto an ungreased cookie sheet using an ice cream scoop.

4. Bake for 15 to 17 minutes or until the tops of the biscuits begin to turn light brown.

5. When you take the biscuits out of the oven, melt 2 tablespoons butter is a small bowl in your microwave. Stir in ½ teaspoon garlic powder and the dried parsley flakes. Use a brush to spread this garlic butter over the tops of all the biscuits. Use up all of the butter. Makes one dozen biscuits.

Recipe Todd Wilbur, "Top Secret Restaurant Recipes 2," Photo by Red Lobster

Outback Steakhouse Honey Wheat Bushman Bread


Along with your meal at this huge national steakhouse chain, comes a
freshly baked loaf of dark, sweet bread, served on its own cutting board along
with soft whipped butter. One distinctive feature of the bread is its color.
How does the bread get so dark? Even though this recipe includes molasses and
cocoa, these ingredients alone will not give the bread its dark chocolate brown
color. Usually commercially produced breads that are this dark -- such as
pumpernickel or dark bran muffins -- contain caramel color, an ingredient often
used in the industry to darken foods. Since your local supermarket will not
likely have this mostly commercial ingredient, we'll create the brown coloring
from a mixture of three food colorings -- red, yellow and blue. My first
version of this clone recipe created a dough that was bit too loose, and the
measurements for the coloring was in drops. Recently, I spent several days
tightening up the formula, and I know you'll find it to be a better clone. If
you have a bread machine, use it for kneading the bread (you'll find the order
in which to add the ingredients to your machine in "Tidbits"). To bake the
bread, split the dough into six even portions that you can roll and cook on a
sheet pan in your home oven.

Dough
1 1/4 cups warm water
2 teaspoons granulated sugar
2 1/4 teaspoons (1 pkg.) yeast
2 cups bread flour
1 3/4 cups whole wheat flour
1 tablespoon cocoa
1 teaspoon salt
2 tablespoons butter, softened
1/4 cup honey
2 tablespoons molasses

Coloring
1 1/4 teaspoons red food coloring
1 teaspoon yellow food coloring
1 teaspoon blue food coloring

cornmeal for dusting

1. Mix sugar with warm water, then dissolve the yeast in the solution. In five
minutes the solution will begin to foam as the yeast begins its gassy dance
party.
2. While the yeast is waking up, mix the flours, cocoa, and salt in a large
bowl. Mix butter into the dry mixture with your hands. Make an impression in
the middle of the dry mixture. Add the honey and molasses into the well. Mix
the food coloring with the yeast solution, then pour the solution into the
well. Stir from the middle bringing the dry mixture into the wet stuff, slowly
at first, then quickly as you incorporate all the ingredients. You will
eventually have to use your hands to combine everything. Knead the dough for 10
minutes on a lightly floured surface, then roll the dough into a ball and place
it into a covered bowl in a warm place for 1 to 1 1/2 hours or until it has
doubled in size.
3. When the dough has doubled, separate it into 6 even portions. Roll each
dough portion into logs that are 6 inches long and 2 inches wide. Pour cornmeal
onto your rolling surface. Moisten your hands then rub water onto each dough
log and roll it in the cornmeal. Arrange the rolled dough on a baking sheet and
cover it with plastic wrap. Set the dough in warm spot to rise for another
hour or so until the loaves have doubled in size.
4. Preheat the oven to 350 degrees. Uncover the dough and bake it for 35 to 40
minutes in the hot oven. When the bread is done, take it out of the oven and
let it cool for 10 to 15 minutes. Serve the bread with a sharp bread knife and
butter on the side. If you want whipped butter, like you get at the restaurant,
just use an electric mixer on high speed to whip some butter until it's fluffy.

Makes 6 small loaves.

Recipe and photos by Outback Steakhouse®

Wednesday, March 3, 2010

Pat O'Brien's Favorite Irish Brown Bread


Pat O'Brien's Favorite Irish Brown Bread

4 cups whole-wheat flour
2 cups all-purpose flour
1 teaspoon baking soda
1 teaspoon salt
1 teaspoon sugar (optional)
About 1 1/4 cups buttermilk

Mix together all the dry ingredients; add enough buttermilk to form a soft dough. Turn out on lightly floured board; knead lightly. Form dough into a circle; place in greased 9-inch baking pan or on greased baking sheet. The dough should be about 1 1/2 to 2 inches high. Cut a cross 1/2 inch deep over the top with a floured knife. This helps bread cook more evenly.

Bake in preheated 400 degree F oven for 40 minutes, or until loaf sounds hollow when rapped lightly on the base with the knuckles. Remove bread from pan; cool on a wire cake rack. Bread should not be cut until it firms up. Toast it for breakfast or tea; spread lavishly with butter.


Recipe by Pat O'Brien's

Irish Soda Bread


Ingredients

3 cups all-purpose flour
1 tablespoon baking powder
1/3 cup white sugar
1 teaspoon salt
1 teaspoon baking soda
1 egg, lightly beaten
2 cups buttermilk
1/4 cup butter, melted
Optional variations listed below.  (We use Raisins)

Directions

Preheat oven to 325 degrees F (165 degrees C). Grease a 9x5 inch loaf pan.
Combine flour, baking powder, sugar, salt and baking soda. Blend egg and buttermilk together, and add all at once to the flour mixture. Mix just until moistened. Stir in butter. Pour into prepared pan.

Bake for 65 to 70 minutes, or until a toothpick inserted in the bread comes out clean. Cool on a wire rack. Wrap in foil for several hours, or overnight, for best flavor.

Makes 1 9x5 pan. I double the recipe and use a small round cake pan.

Variations of Irish Soda Bread
1 cup raisins,
craisins,
citron or
dried fruits
and a few tablespoons caraway seeds may be added.
You can also add a few drops of green food coloring to make it green for St. Patrick's Day.
Related Posts Plugin for WordPress, Blogger...